Call for Abstracts
This short video shows you how to define the Call for Abstracts in Indico and open it to candidate Abstract submissions:
See here these steps in detail:
As an event manager click on Call for Abstracts on the left banner, under Workflows.
Click on Enable module and you will be directed to your "Call for Abstracts" page.
On this page, you will be able to: - define Settings related to the types of questions asked during the review of an abstract, - select the users who will review the abstracts, - officially open the call for abstracts
and more...
The Schedule box defines when the call for abstracts will be open for submissions, at a given future date, or right now.
Before opening the Call for Abstracts, you have to define the parameters below.
Email notifications
To customise the email notification templates to send to the users who submit their abstracts, click on Notifications, and click on Add new one. Here you can add what we call a "notification ruleset", i.e. a specific email template to send when a rule is matched. For example: if an abstract is submitted, a certain email notification will be sent.
Choose a Title for your ruleset, and select the email template that you want, for example “Submit”. Then you will have to select a rule, for example “submit”, like your email template. click on Add new rule and select Submitted. Click on Save.
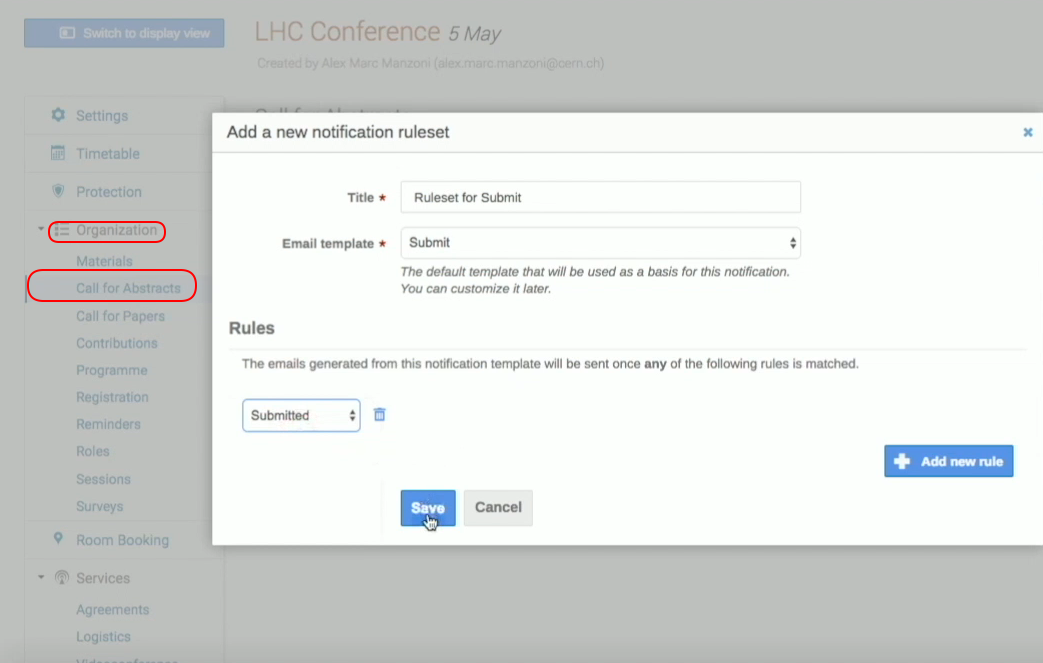
You can add new rulesets by clicking on Add new one, for example for when a abstract is Accepted or Rejected.
Configure abstract submission
From the "Call for Abstracts" management page, click on Settings on the Submissions raw which leads to to the Configure abstract submission screen.
Write in an Announcement you want to be displayed when users submit their abstracts.
Select the options that suit you, such as: - allowing the selection of multiple tracks, - making the track selection mandatory
etc.
If you want to limit the abstract submission to a selected few, you can add a limited number of users in Authorized submitters.

Scroll down for the instructions box, if you wish to insert some additional advice to submitters. Click on Save.
The Fields and types raw contains options, where you (as conference manager) will have to define and add the type of the contributions you allow, such as Oral or Poster, for example. Click on Contribution types, New contribution type and create a few.

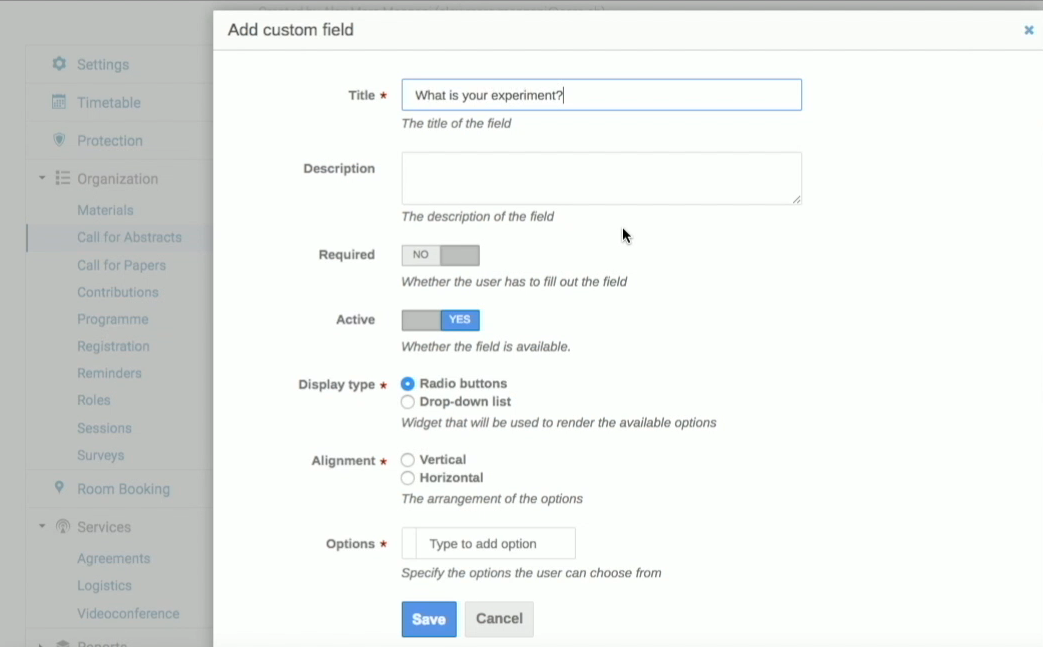
From the same Fields and types raw click on the Abstract fields box, to add new fields tailored to your event, such as a question, or simple text. To do this, click on Add new field, and then on Single choice if you allow only one of the available options. Enter the question and select how your want your question to be displayed, for example with radio buttons, displayed vertically. Click on Save and close the window.
Configure Abstract Reviewing options
Always on the "Call for Abstracts" management page a raw on Reviewing options allows you to define the questions used in the abstract reviewing process.
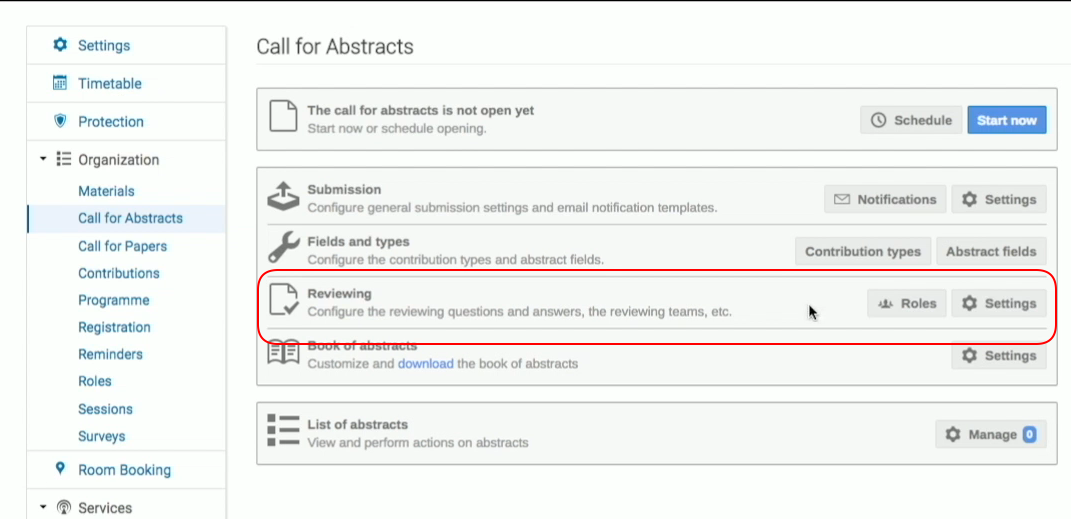
Click on Roles. In this page, you can add users as Reviewers and Conveners. Reviewers provide an assessment of the abstract with their review, and they can consult only their own reviews. Conveners can read all reviews in their tracks and, like the event managers, can act as Judges, who can effectively accept or reject an abstract based on the feedback left by the Reviewers.
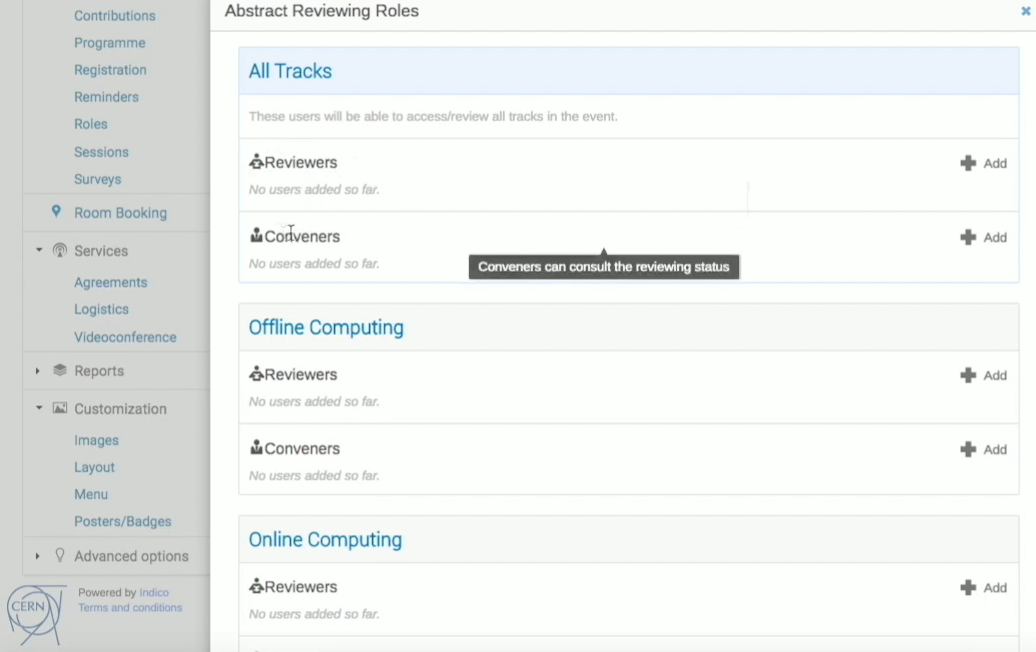
The idea is that you can have a team of specialists for specific tracks, such as “Online Computing”, in the example above. You may Add Reviewers or Conveners for a selected track (or for “all tracks” at the top). You will be offered the possibility to Search for existing users and add them.
Click on Save once you’ve chosen all the relevant people for these roles.
Now click on Settings, at the right of Roles to define, as event manager, a set of questions, to be used as a guide for the reviewers and the scale for the answers to these questions, from 0 to 5 for example.
Below you have certain options such as allowing conveners to accept or reject an abstract, allowing comments in your review page, and allow contributors in the comments.
Under Review questions, type in your questions, click the disk icon on your right to save your question and click on Add if you want to add a new question, for example “What is the quality of the content?"
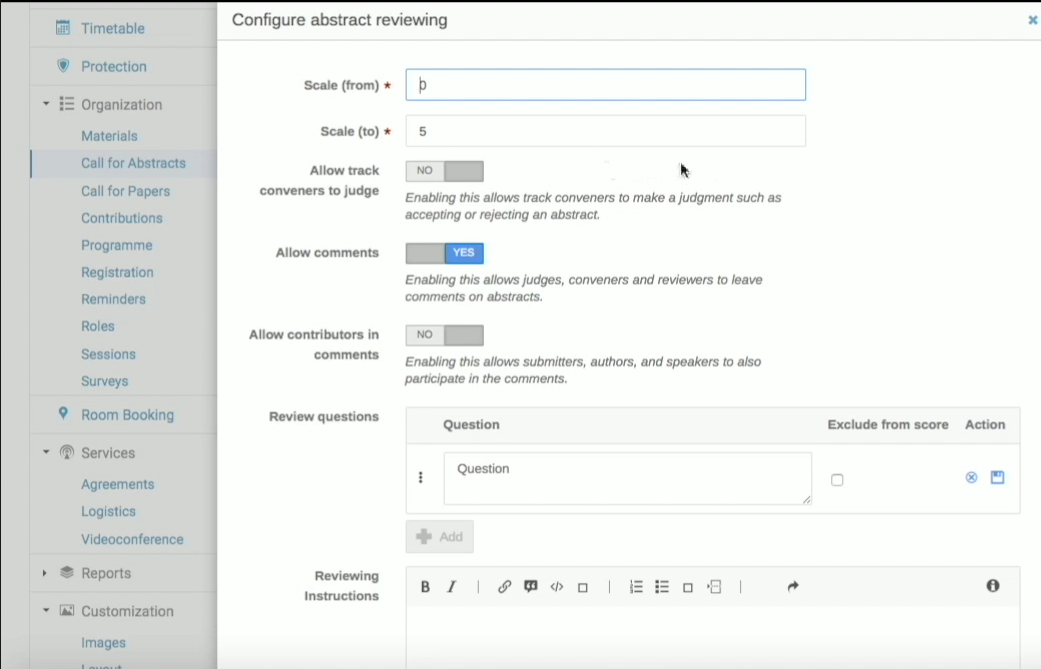
Finally, write in some instructions for the Reviewers and for the Judges, who need to ultimately accept or reject an abstract based on the review.
Once you have chosen your Scale and your questions, click on Save at the bottom of the page.
The Book of Abstracts
The book of abstracts is a configurable and downloadable document (in pdf) where only the accepted abstracts will be published.
To configure the book of abstracts, click on Settings from the relevant raw of the "Call for Abstracts" management page.
Write any additional text that will be included on the document, and select the sorting criteria for the abstracts’ appearance in the book. Click on Save.
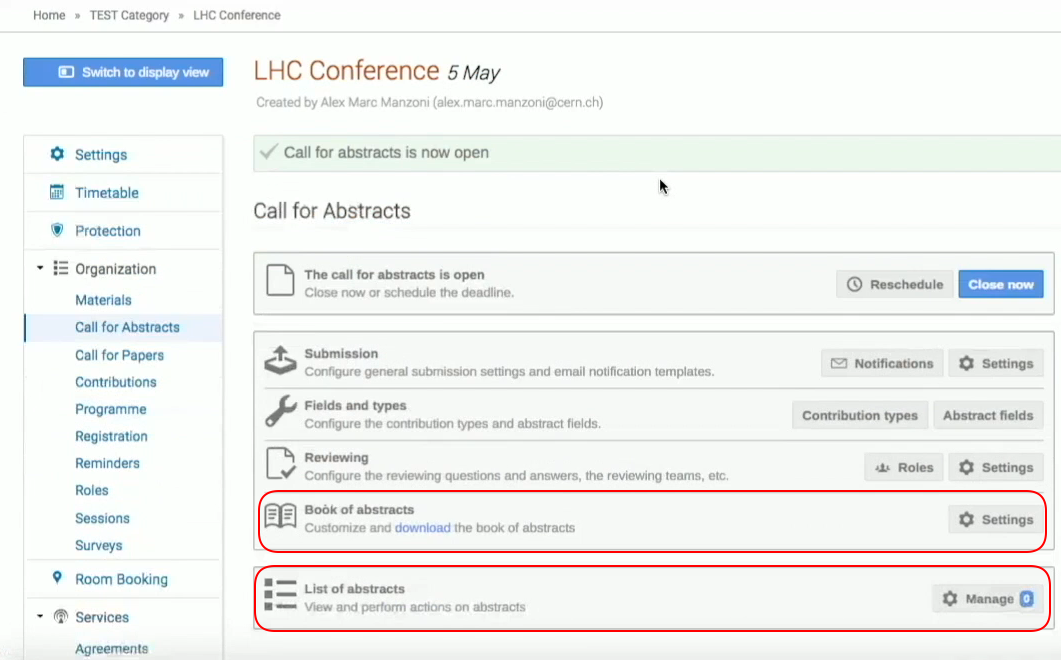
The List of Abstracts
This is the list of all abstracts and it is built automatically once the "Call for Abstracts" is open. You can rearrange this list by clicking on Manage.
Open the Call for Abstracts
From the same management page, you can click on Schedule and select the start, the end and modification deadline of your call for abstracts. Otherwise, if you want to open it right away, simply click on Start now.